Tightening Hinges

Item hinges tend to loosen over time. To tighten a hinge, you will need glue and a glue brush, scrap paper, a bone folder, and a weight (can be a heavy book).
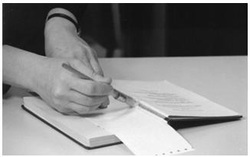
Open the item to the place where the text block (the ‘meat’ of the item) and endpaper have separated.
Lay a piece of scrap paper along the text block about half a
centimetre from the exposed hinge area. Carefully brush glue on the exposed spine lining and on the underside of the fold of the endpaper.
Lay a piece of scrap paper along the text block about half a
centimetre from the exposed hinge area. Carefully brush glue on the exposed spine lining and on the underside of the fold of the endpaper.
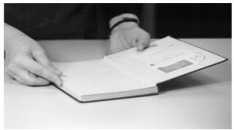
With the book still open, carefully align the endpaper and the text block to ensure that the fold of the endsheet exactly meets the shoulder of the text block (Fig. 10).
This will help ensure proper opening of the book after drying.
This will help ensure proper opening of the book after drying.
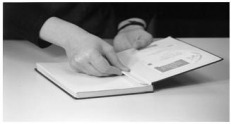
Using the long edge of the bone folder, gently press the fold of the endpaper into the hinge
Check to make sure that the text block is aligned properly. Then run the long edge of a bone folder down the length of the outer hinge of the case, applying even pressure
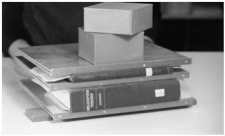
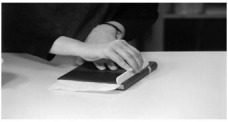
Finally, press the book for several hours or overnight, making sure that even pressure is applied in the joints. Note the placement of the weights just in front of the hinges.
When the repair is dry, make sure the hinge is secure and attached to the book, change the status back to 'In Library' as outlined in 'Getting Started' and return the item to the shelf.
Back to Stacks Maintenance
When the repair is dry, make sure the hinge is secure and attached to the book, change the status back to 'In Library' as outlined in 'Getting Started' and return the item to the shelf.
Back to Stacks Maintenance
