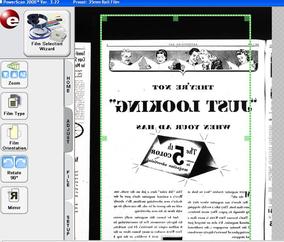
Microfilm/Microfiche - Improving the Image
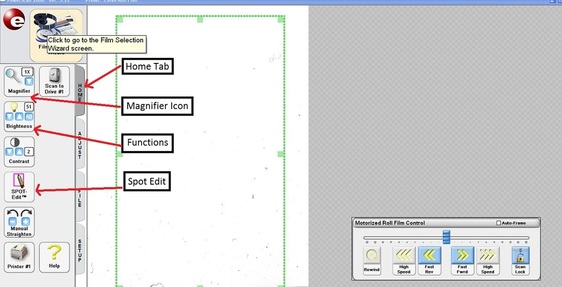
To improve an image, begin by ensuring that you have selected the 'HOME' tab. This will give the options of enlarging the image; improving the image brightness; enlarging portions of the image; and rotating the image.
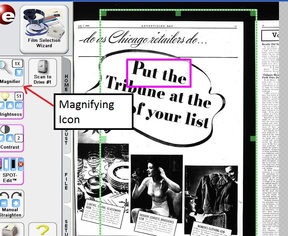
In the magnifier icon, select the degree of magnification from the drop down box. Once done, place the cursor on the lens of the magnifying lense in the icon. As long as you click and hold on this spot, the image will increase in size by the factor you have chosen from the drop down box.
Brightness and Contrast are quite simple. Merely place the cursor on the appropriate icon and the image will increase or decrease in brightness depending on your selection.
The 'Spot Edit' icon allows the user to identify and greatly enlarge a specific piece of the image.
Once the 'Spot Edit' icon has been selected, you will notice that you are now presented with options:
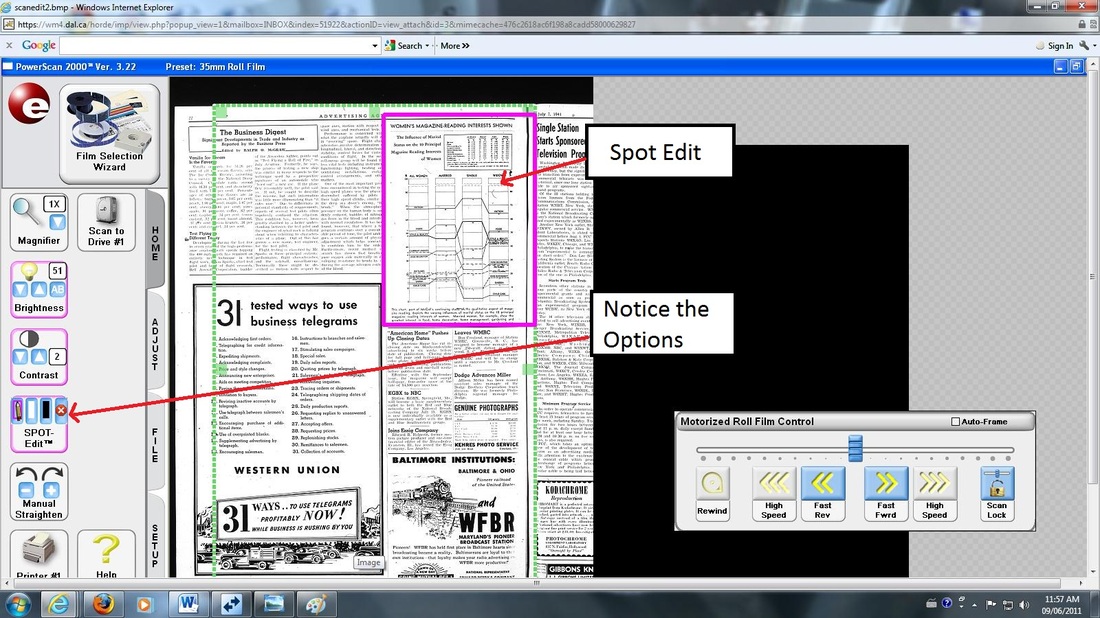
If you wish to enlarge a specific portion of the image, click on the appropriate feature, place the cursor on the area selected to be enlarged, and click.
As you can see, a purple area opens. This can be cropped or expanded to allow enlargement of a larger or smaller area.
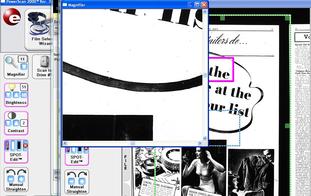
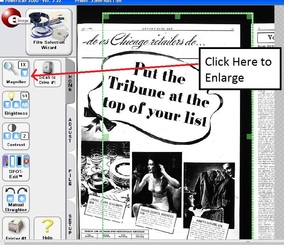
Having selected the required area, click on the magnifying lense in the top icon (see above photo). This will boost the size of the selected area.
Should you wish to block/remove a portion of the image prior to printing or saving, this is also possible. To achieve this, again open the 'Spot Edit' icon:
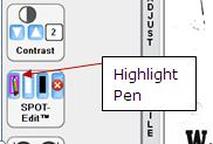
To highlight a particular area to be blocked, click 'Highlight Pen' within the 'Spot Edit' icon.
Having clicked on the 'pen', place the cursor on the area to be blocked. This area can be cropped. A purple line encompasses the desired area:
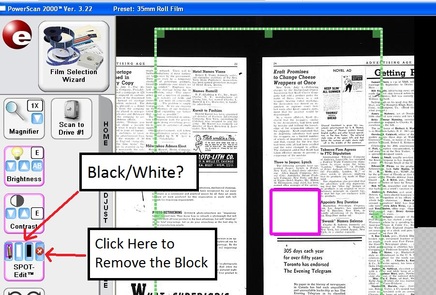
By clicking on the appropriate colour (white or black), the enclosed area will appear as a white or black shape. To remove this block and return the image to its former "glory", simply click the 'X' button within the 'Spot Edit' icon.
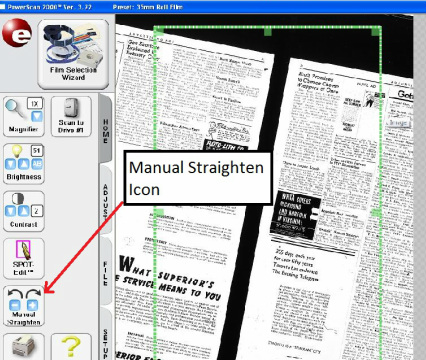
In order to obtain the optimum position of the image for printing, it may be advantageous to rotate the image slightly. This can be achieved using the 'Manual Straighten' icon. Using this feature, the image can be rotated in small increments either to the right or the left.
In order to obtain the optimum position of the image for printing, it may be advantageous to rotate the image slightly. This can be achieved using the 'Manual Straighten' icon. Using this feature, the image can be rotated in small increments either to the right or the left.
More radical refinements may be warranted in order to achieve the optimum image prior to saving/printing. This can be achieved using the 'Adjust' tab:
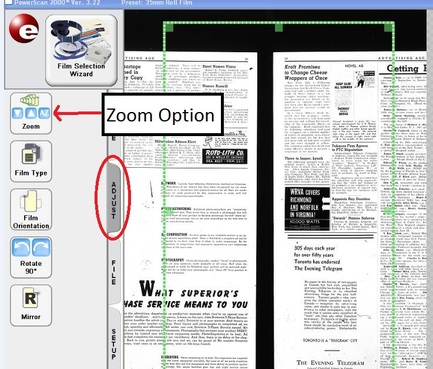
Normally the printer will print only the material enclosed within the green area. However, should it be necessary to print an enlarged area, select the 'Zoom' option. This allows for very specific instructions to be given to the printer.
Occasionally a film (but more usually fiche) will be negative (i.e. the script and images are printed in white on a black background). This does not deliver the best reproduction. The 'Film Type' icon will solve this problem.
Click on this icon and, if the image is white print on a black background, select the white option.
Change the image by clicking on the black option within the 'Film Type' icon:

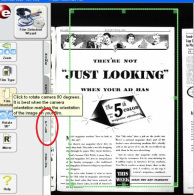
Obviously if presented with this as the original format, the white option would bwe selected to achieve black print on a white background. As mentioned earlier, the printer will only print the material within the confines of the green lines. However it may be necessary to change the orientation from 'portrait' to 'lanscape'. This can be achieved by using the 'Film Orientation' icon.
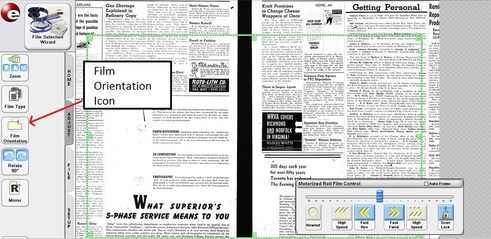
Notice that after clicking on this icon, the green lines have been rotated to change this image to 'landscape' format for printing purposes.
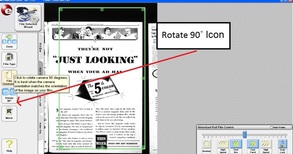
Once the 'Rotate 90' icon has been pressed, the image is rotated (as portrayed in the next image). Again, this is a useful tool to facilitate printing.
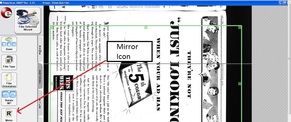
The final icon in the list is 'Mirror'. Occasionally a film is wound onto a reel backwards (i.e. the image appears as a mirror image of that which is required). Using this feature we can deal with this problem.
After pressing the 'Mirror' icon, the image is transformed to.....
Once satisfied with the image quality, if an article is to be printed/saved, several options are available. Begin by selecting the 'File' tab. Scan size allows ver specific parameters to be used in the scanning process - This feature is unlikely to be required by most, if not all, users.
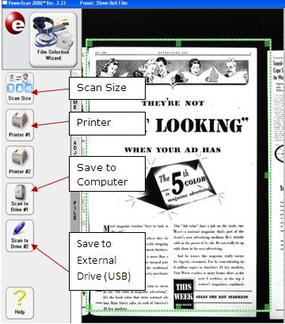
By clicking either of the printer icons, the print job will be sent to the student printers in the learning commons - Be sure that the patron has enough print credits to facilitate printing. Pressing the 'External Drive' icon allows the data to be stored to a USB.
The data can also be stored to the computer's hard drive ('C:\' drive) and be emailed to the patron as an attachment.
