Overview of the Aleph Circulation Module

This section will take a look at the basic parts of the screens found in the Circulation module of the Aleph system.
What you see below will soon be very familiar to you. When you open the Circulation system, the screen that is presented offers any number of useful components, and gives us quick access to every on-line Circulation function we will need.
As we explore the screen, you will have an opportunity to visit buttons and drop-downs, though there are a few sensitive areas we ask you not to touch.
This screen features:
- A series of icons
- Some drop-down menus
- Panels in which other menus or active information about patrons and books is shown
- Buttons that change information on the screen, lead to other parts in the Aleph system, and allow changes or additional record entries
As with many Windows applications, when you pass the cursor over an icon you often will see displayed a small box that indicates what the icon is used for.
- In the case of buttons and drop-downs, you need to select the menu or press the button to have an effect.

The top bar is a standard Window frame, and identifies the activity you are engaged in. It tells you the software and the version of the software, what place in the Aleph structure you are working from, and who you are signed in as. In this case, SMUCIRC:

On the bar below the Windows frame is a series of nine drop-down menus:
Now, we are not about to tell you what they all do at this point. That information is found in the appropriate sections of this manual. you should know the following about what lies beneath these menus:
Now, we are not about to tell you what they all do at this point. That information is found in the appropriate sections of this manual. you should know the following about what lies beneath these menus:
- First, most of them will never be of use to you. Lots of them lead places that only the most experienced staff member travels, and then only rarely.
- There are Circulation activities (such as ordering and printing use reports and statistics, changing the activity status of items within the system, and running the system when the main server is down) that can only be accessed here.
- There are a couple of items in the drop-down menus that can cause long-term problems with the system. Although it is difficult to cause long-term damage in these menus, it is best to stay away unless you are specifically and thoroughly trained in their functions.
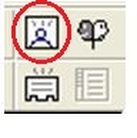
Off to the right is a pocket of four icons:
Of this group of four, we only use the top left-hand icon. Press it, and you can add a new patron's record to our database.
- You will notice that only three of them are outlined in solid lines. This means only those features that are highlighted are the ones you can actually use.

Look over to the left side of these two bars, where you see two data-input windows, one with a face and one with a book next to it, followed by a box with three dots and an arrow:
The top field is where you input a patron's barcode or ID number to access the patron's record. The bottom is where an item barcode goes.
The top field is where you input a patron's barcode or ID number to access the patron's record. The bottom is where an item barcode goes.

We will return to these two fields, but first, look at the bar below them:
If you pass the cursor over these tabs, you learn the names of each tab, but not much else. As you click on each tab, however, a new menu appears in the pane below, and new buttons appear on the right-hand side of the screen.
The fifth tab controls the booking of services or material (such as room reservations or laptops) which is not yet operational. It is also the location of the Task Manager (generally not used by student assistants).
As you press various tabs, look at the data-input windows above them:
- When you select the 'Loan' tab, both windows light up. You need both an item and a patron to perform a loan transaction.
- When you click on 'Return', just the book window is highlighted.
- The 'Patron Activity' lights the patron window.
- 'Items' gives you the book window.
- The 'Admin' you just read about, and the 'Search' we will look at later.
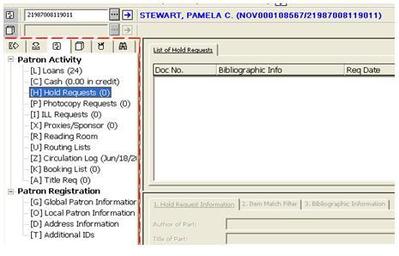
Just for the exercise, select the patron tab, and then enter your barcode in the top field. Your name appears to the right of the input window followed by two series of numbers in brackets.
A new menu appears below. If you click menu items below the tab, information in the two right-hand panes changes and various buttons highlighted change as well.
This is a good place to remind you of the Library's policy on confidentiality:
A new menu appears below. If you click menu items below the tab, information in the two right-hand panes changes and various buttons highlighted change as well.
This is a good place to remind you of the Library's policy on confidentiality:
- The information you access about your fellow patrons, is only to be used for Library purposes. All information contained in a patron's record is strictly confidential.
- This has long been an important ethical foundation of library services everywhere, it is an important University policy, and it is strictly enforced.
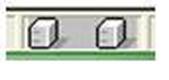
Finally, at the bottom of the screen you will see sets of icons at the left and the right.
The set on the left is seldom referred to:
- This box shows communications between your terminal and the central computer. You will only notice them if your connection is very slow; the line running between them will reassure you that something is really going on.
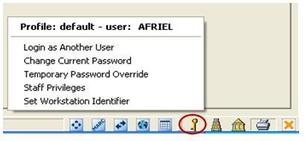
Of the set on the right, the four enclosed in squares take us from the Circulation module of Aleph to the working spaces used by other Library Departments, such as Cataloguing and Acquisitions.
Of the remaining four, only the one that looks like an old-fashioned key will ever be of interest to you. Right click on it, and a window appears. Only three of these menu items are useful: the top, the middle, and the bottom one.
Without entering data, look at each in turn.
The first, 'Login as Another User', will allow you to change the identified User of the system. We seldom use this, as we like to keep all of our desk terminals working as the user 'SMUCDESK'.
However, there are times when we must change the User. The system gives full-time staff members the power (called 'privileges') to do things other staff cannot. To change the User:
Among the occasions when this extra power is needed we must change the 'Workstation Identifier', essentially making the system believe that the terminal is operating from another library. See Changing the Workstation Identifier in the Check-Out section of the manual (Chapter 9).
The Circulation Screen is your primary workspace, and offers you many of the tools that you will use to do most of your online tasks. It looks complicated now, but straightforward routines are easily mastered.
Back to Computer Basics
Of the remaining four, only the one that looks like an old-fashioned key will ever be of interest to you. Right click on it, and a window appears. Only three of these menu items are useful: the top, the middle, and the bottom one.
Without entering data, look at each in turn.
The first, 'Login as Another User', will allow you to change the identified User of the system. We seldom use this, as we like to keep all of our desk terminals working as the user 'SMUCDESK'.
However, there are times when we must change the User. The system gives full-time staff members the power (called 'privileges') to do things other staff cannot. To change the User:
- Press the middle menu item, 'Temporary Password Override' and a window pops up asking for your username and password.
- This popup is used to input the identity of the temporary user that when done will 'Close' the temporary override to revert back to SMUCDESK privileges.
Among the occasions when this extra power is needed we must change the 'Workstation Identifier', essentially making the system believe that the terminal is operating from another library. See Changing the Workstation Identifier in the Check-Out section of the manual (Chapter 9).
The Circulation Screen is your primary workspace, and offers you many of the tools that you will use to do most of your online tasks. It looks complicated now, but straightforward routines are easily mastered.
Back to Computer Basics
